Getting Started

A guide to getting up and running with Guru.

Thanks for purchasing Guru! This guide covers the basic usage of the template as well as a guide to selling courses using Webflow E-Commerce. If you require assistance please don't hesitate to get in touch via the Template Support Page.

General Usage

Blank Starter Template

Inside the "Template" directory, you'll find a page titled "Blank Starter Template". This template includes a navigation bar and a footer - the ideal starting point for your pages.

1. Duplicate the Blank Starter Page template

Note: Be sure to change the Parent Folder to the desired location.

2. Create or Copy and paste blocks to the newly created page:

Copy Sections from any page, then paste them into the body of your newly created page. Also you may copy sections from any other page in the template.

Style Guide

The Style Guide page demonstrates the display of all base elements found in Guru and is a good place to start familiarising yourself with the template.

You'll also find a section demonstrating how to correctly use the associated utility classes.

Editing Typography Styles

Setting heading styles

Instead of using classes, you must click the header then in the Selector drop-down where you would type in the class name, select “All H1 Headings” then make your change.  Same goes for all base heading elements. Click the element, choose “All heading 5”, then any changes you make to that will be reflected across all in the site.

Setting Body Text and paragraph styles

Follow the same procedure for body text and paragraphs - which are specified on the Body element.  Select the body element, and from the Selector dropdown, choose “Body (All Pages)” and change the typography settings for that element.  These styles then flow through to the paragraphs and other generic text elements in the site.

Containers

Guru uses 3 container sizes to house the contents in most sections. For your convenience, you can use these classes to easily contain content in your sections:

  1. Container: The standard sized container class that limits content to 497px
  2. Container Large: An increased sizes container that limits content to 608px
  3. Container Small: A reduced sized container that limits content to 386px

Additionally, use the class Align Center to align the container in the center of its parent element.

Disabling the Loading Animation

If you'd prefer not to use the loading animation:

  1. Remove the "Loader" symbol from the elements on the page.
  2. Remove the "Page Loading Animation" interaction from the Interactions panel in the right-hand sidebar.
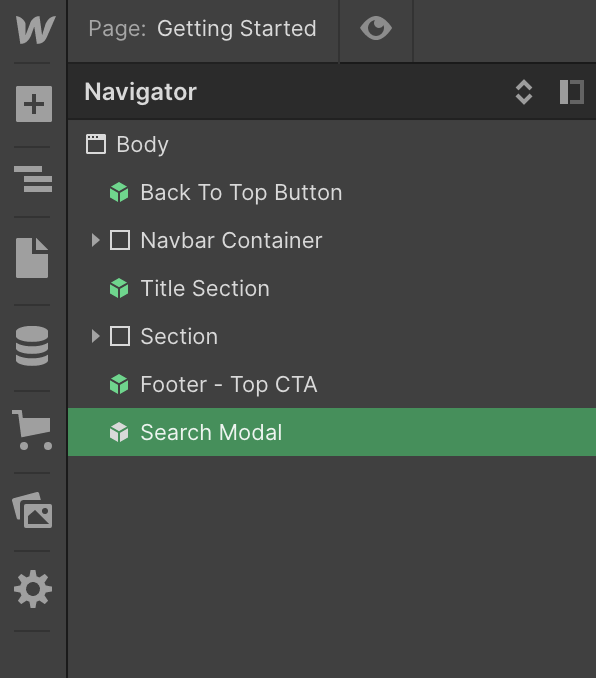
Search Modal

For correct function of the search modal, you will need to ensure that the Search Modal symbol is place as the last element inside the body of the page.
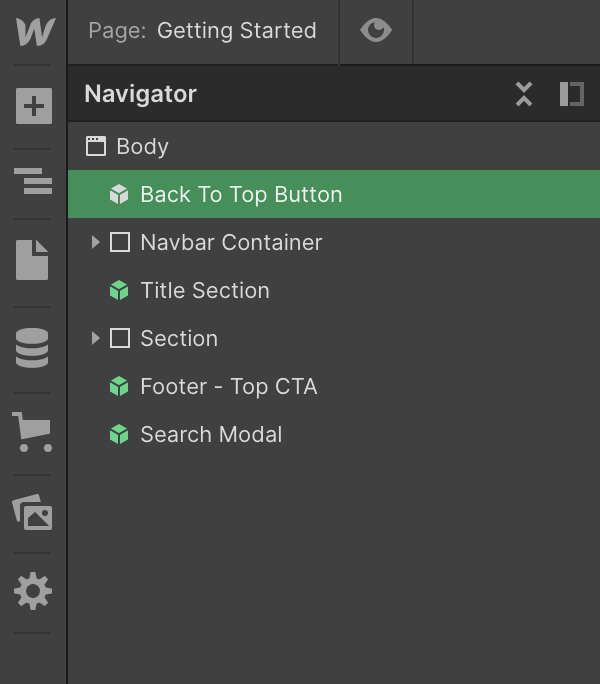
The search modal symbol.

Back To Top Button

Ensure that the Back To Top Button symbol is the first element inside the body.

The Back To Top Button symbol.

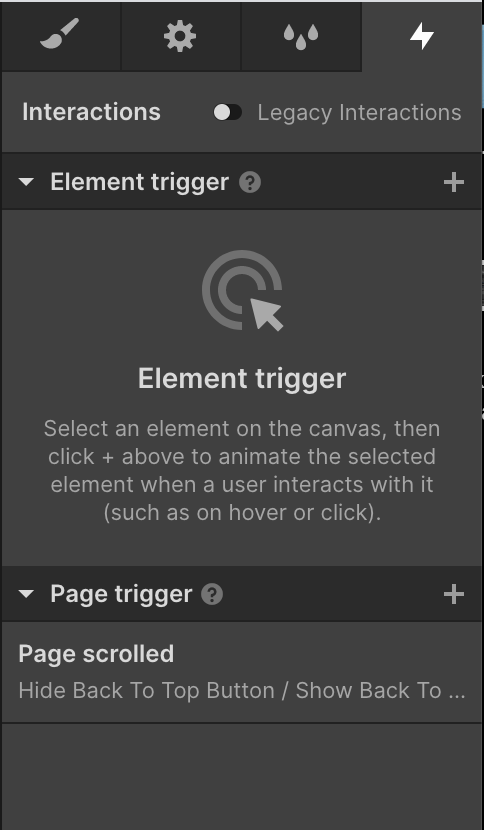
Then, ensure the page has a Page Scrolled interaction with the Hide Back To Top Button interaction activates when the page scrolls up, and the Show Back To Top Button interaction activates when the page scrolls down.

The Page scrolled interaction

Icon Colors

Unfortunately Webflow does not allow dynamic coloring of SVG icons. To change the icon color from the default orange:

  1. Download the icon SVG file
  2. Open the SVG file in a text editor
  3. Change the hex value to your desired color
  4. Save, and reupload the icon.

Custom Code

Inside the Project Settings, in the Custom Code tab you'll notice some style code has been added to the head of each page:

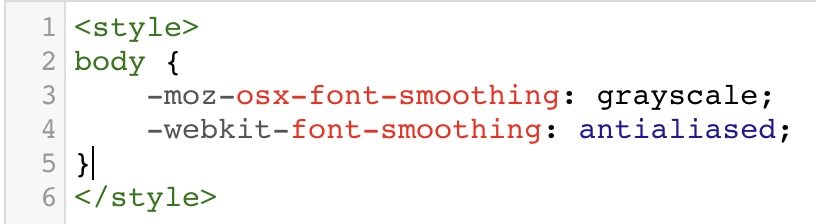
Font Rendering Custom Code

This code is to ensure that the text rendering is smooth and consistent across all browsers. It does not require any action on your part.

More Information

For further information, please consult the Webflow documentation or reach out to us via the Template Support Page.

E-Commerce & CMS

All courses in Guru are stored in the Courses section of the CMS.  All Courses will be listed as free until they are linked to a Product using the Product Link field in the Course CMS fields.  

Adding a new course

First, it is wise to set up your Categories in the Ecommerce tab and Course Authors in the CMS tab.  These are required fields for Courses so it is necessary to have them in place before adding or editing Courses.

We recommend adding a new Course by duplicating an existing Course that came pre-loaded in the template.  This will allow you to easily see how each of the CMS fields works and can be a handy way to get up and running when you may not have the complete content for your Course ready.

You may unpublish the pre-loaded demo courses and lessons to hide them from view and save them for later reference or duplication.  You may also delete the pre-loaded courses if you no longer have a use for them.

All Lessons (paid and free) are stored in the Lessons section of the CMS.  We recommend setting up your Course before adding a Lesson, as the Lessons require a Course reference to link them together.

How courses are listed

Paid Courses will show a yellow price tag if they have been linked to a Product in the CMS.  Guru uses conditional visibility to direct users straight to the free Course or, in the case of paid courses, to the Product page to make a purchase.  When courses are listed, a free course listing will link directly to the course itself.  When a course has the Product Link field set in the Course CMS entry, Guru will instead link to the Ecommerce Product rather than the course content, so that the user is prompted to purchase the course first.

New Course Quick Start

This is a brief guide to the order in which you would set up a new Course:

  1. Add Course Authors
  2. Add Categories in the Ecommerce tab
  3. Add Course details:
    a. If the course is free: add a Course and leave Product Link blank
    b. If the course is paid: add a Product in the Ecommerce tab then add a Course and set the Product Link field to your newly created Product.
  4. Add Lessons and set the Course field to your newly created Course

How Users Access Paid Courses

When a user has purchased a paid Course, they are automatically sent a link to download a file.  This file is something you must create and host somewhere on the internet.  This may be hosted on Dropbox, Google Drive, traditional hosting, or in your Webflow assets.  The URL to this file is a required CMS field for each paid Course you offer.

The file may be a PDF in the style of your brand, and it must include a link to the paid Course URL and optionally a password (see security notes below).  You may even provide this in the form of a zip file with demo code, design assets or other provided content that is relevant to your courses.  However, the file must always include a link to the Course on your site.  This is how paying customers gain access to your paid Courses.

Secure your paid content

It is currently not possible to lock users out of paid content, nor is it possible to provide your users with an account facility to access their purchased Courses.  For this reason, the course and lesson content is freely accessible if you know the URL.  With this in mind, we recommend changing/obscuring the URL for paid courses and paid lessons in order to make the URLs harder for crafty users to guess and gain access for free. For example, you may add a random string of letters and numbers to the end of Course and Lesson URLs to make it impossible to guess:

https://yourcourses.edu/courses/how-to-poach-the-perfect-eggs

With added random string becomes:

https://yourcourses.edu/courses/how-to-poach-the-perfect-eggs-a4b28cb9f7e7a92c04

You may also like to add a password to protect your lesson pages which would only be distributed in the downloadable file.